

How to convert and burn PowerPoint presentations to DVD?
- A guide about mediAvatar PowerPoint to DVD
As the name of the program implies, mediAvatar PowerPoint to DVD allows users to convert and burn PowerPoint presentations to DVD. mediAvatar PowerPoint to DVD supports inputting .PPT, .PPTX, .PPTM, .PPSX, .PPS, .PPSM, .POTX, .POTM, and .POT presentation formats and outputting presentations as a DVD disc (DVD-R, DVD+R, DVD-RW, DVD+RW, DVD+R DL, DVD-R DL, DVD-5, and DVD-9 are all supported), convert them into a DVD folder or ISO image file.
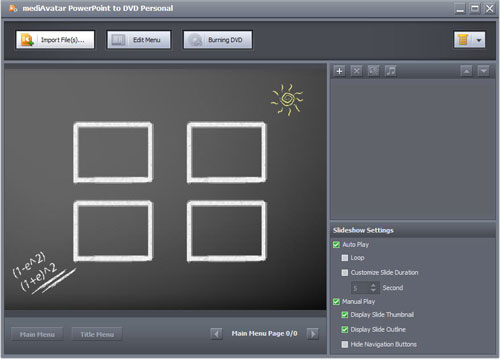
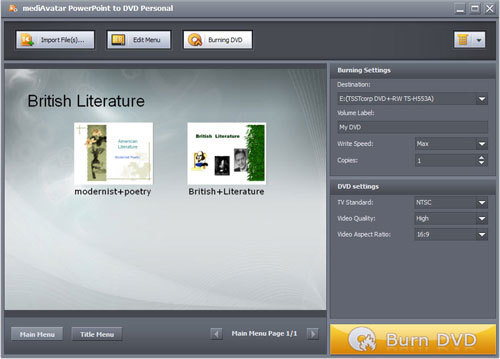
After you download, install and start mediAvatar PowerPoint to DVD, you will see what this PowerPoint to DVD's main window looks like:
Converting presentations to DVDs with this PPT to DVD converter is pretty easy. Literally users can convert PPTs to DVDs with only a few clicks:
- Import presentations (multiple presentations can be imported)
- Select DVD menu template to make a menu
- Select output format (DVD disc, DVD folder, or ISO)
- Convert
It seems so easy to convert PPT to DVD, but actually it isn't always that simple, because within those four steps there are customization options available for users to adjust as so to create a customized presentation DVD. Okay, here we would like to show users the details.
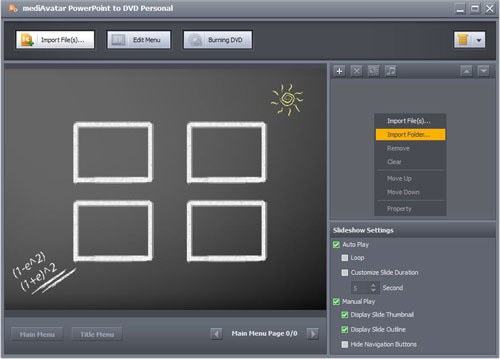
Step 1: Imports Presentations
Drag and drop the presentations onto the main program window, or click on "Import Files…" or + button on the right panel (multiple presentations can be selected at one time) to load as many presentations as you want, or right-click on the box under the + button and select "Import Folder" to choose a folder to import all the presentations in the folder.
Step 2: Adjust Slideshow Settings
Choose a presentation, customize the "Sideshow Settings" at the bottom of the right panel.
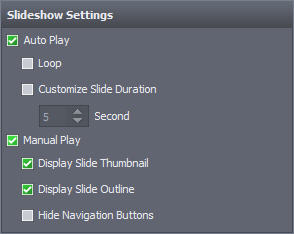
The PowerPoint to DVD allows DVDs to be played in two modes: "Automatic" and "Manual".
In automatic mode, each slide and inter-slide event is automatically advanced, and the "Customize Slide Duration" option allows users to set how long each slide will show.
In manual mode, the program allows users to manually view individual slides (via thumbnail or title) and the whole presentation.
Tips:
1. Manually viewing the whole presentation only allows you to control when each slide is advanced, but the inter-slide events are still automatic.
2. Users can select automatic mode, manual mode, or both. However, if your select to have only automatic mode you have the option of having no DVD menu. If you have manual mode you are required to have a DVD menu.
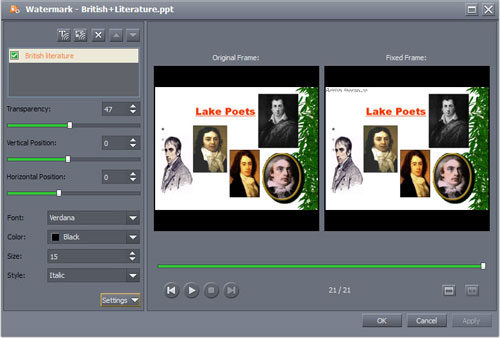
Step 3: Add Watermarks and Soundtracks
Add watermarks by clicking "Watermark" button on the right panel.
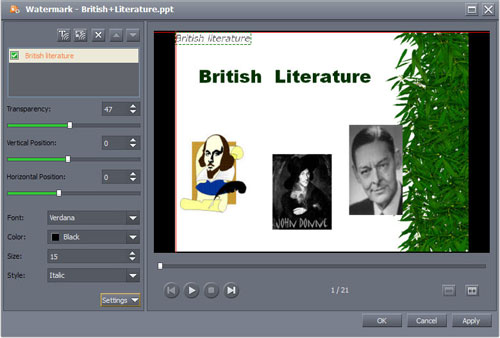
This PPT to DVD converter allows users to add text and/or image watermarks. You can add as many watermarks as you want. When adding image watermarks, .BMP, .JPG, .PNG, .GIF, and .TIFF images are all supported.
You can view before-watermark and after-watermark effects of the presentation so you can figure out how the watermark will look:
Add soundtracks by clicking "Music" button on the right panel.

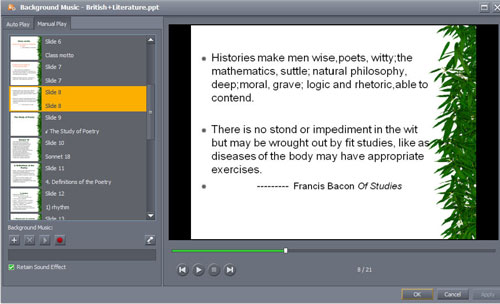
If you chose both automatic and manual modes in the Step 2, you have to set different audio when adding background soundtracks.
In automatic mode, you have two ways to add audio. One is add music files from your computer and retain the original sound effect, the other is to rehearse the presentation and record custom commentary during rehearsal if you don't want the original sound. However, you can not specify audio tracks for specific slides. While in mannual mode, you can specify different audio tracks for each slides. .AAC, .AIF, .AC3, .APE, .AU, .FLAC, .MPA, .MP2, .MP3, .MP4, .M4A, .OGG, .RA, .RAM, .WAV, .WMA are all the supported audio formats.
Step 4: Make DVD Menu
Now it comes to click on the "Edit Menu" button at the top to make your own DVD menu.
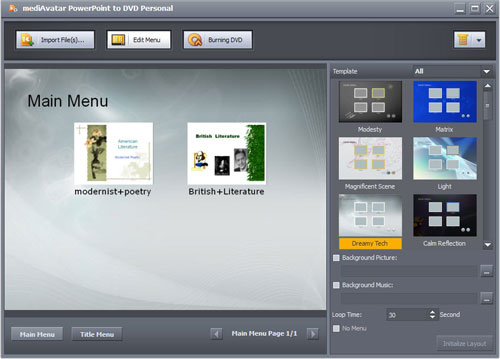
In total there are 30 templates to select from. In regards to the DVD menu, any text on the main menu and title menu (aside from the text in the background image) can be customized (double-click on the text and change it), all objects (text, images, and buttons) can be dragged around and placed at a custom location, and a custom background picture can be used for the DVD menu, custom background audio track can be used for the DVD menu, and the loop time for the menu can be set.
If you chose to only have automatic mode for the DVD in the "Slideshow Settings", you can opt to have no menu at all. Once you have manual play, you have to create a menu because without a menu you couldn't have manual play.
Step 5: Start Burning
Now it comes to what you want to output.
Click the "Burning DVD" button at the top, then on the right panel, you can set to burn directly to a DVD disc, output as a DVD folder, or output an ISO image, the DVD volume label, how many copies do you want to burn, the TV standard to use (NTSC or PAL), the video quality (Highest, High, Normal, Low, Lowest) and the aspect ratio to use (4:3 or 16:9).
After all above settings, click "Burning DVD" button at the top of the application and hit "Burn DVD" button at the bottom to start burning!
Want to have a trial now? Go to this mediAvatar PowerPoint to DVD for free download to explore more features.